
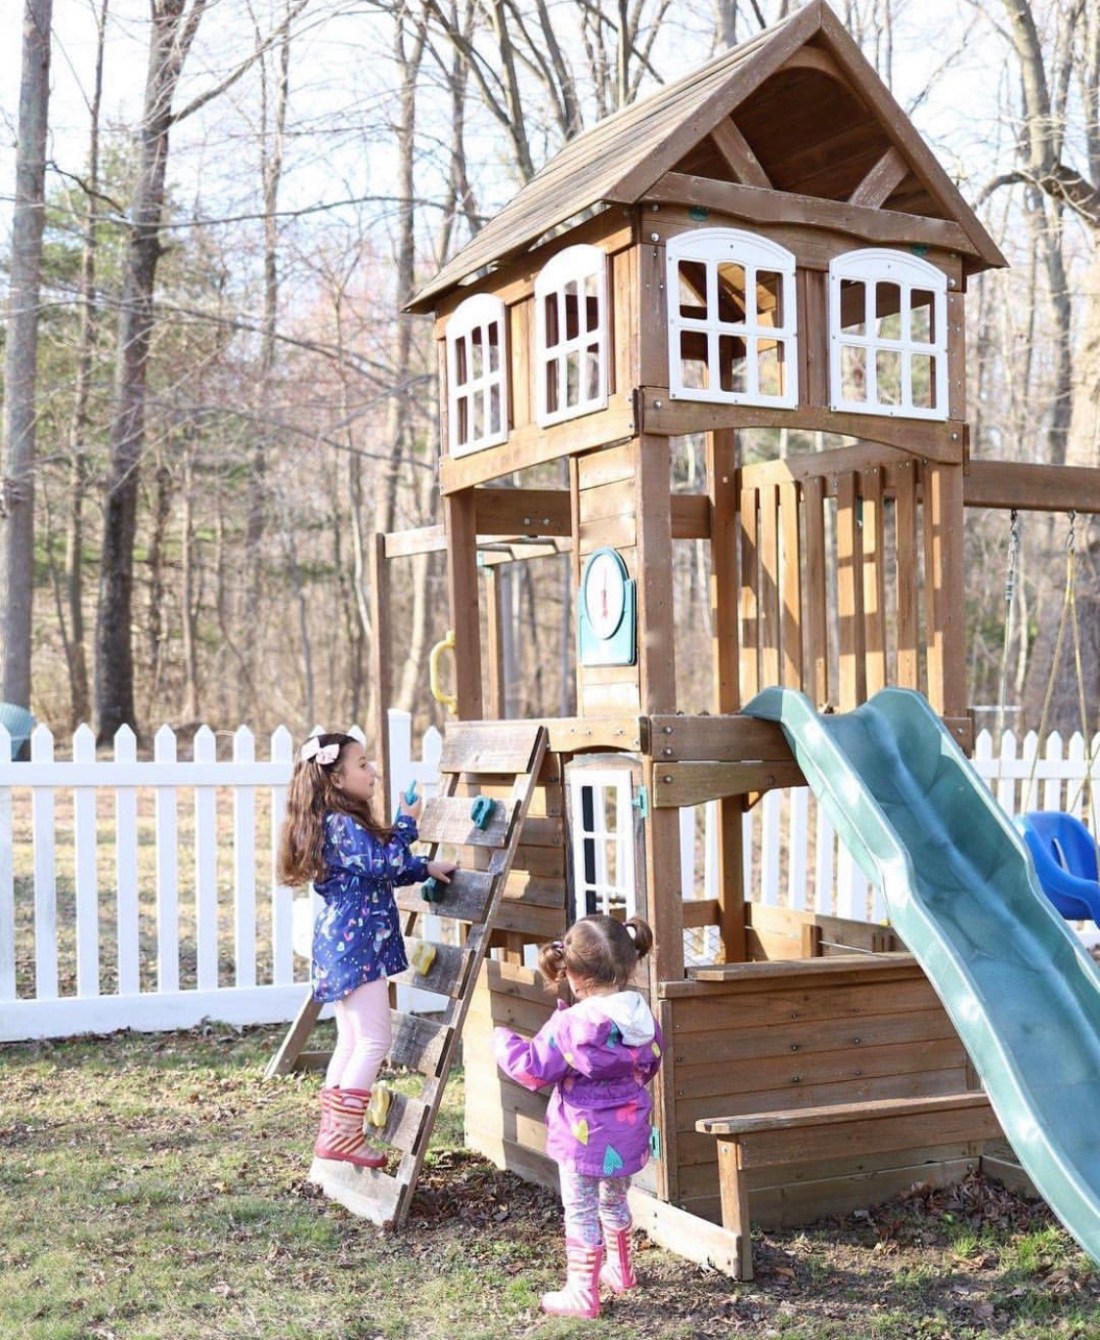
We purchased our swing set 5 years ago. It’s a KidKraft model and has held up amazing! We wanted to change the layout to make it more functional for the girls now that they are older and add a few of our own touches along the way.
Here is what it previously looked like before the Makeover.
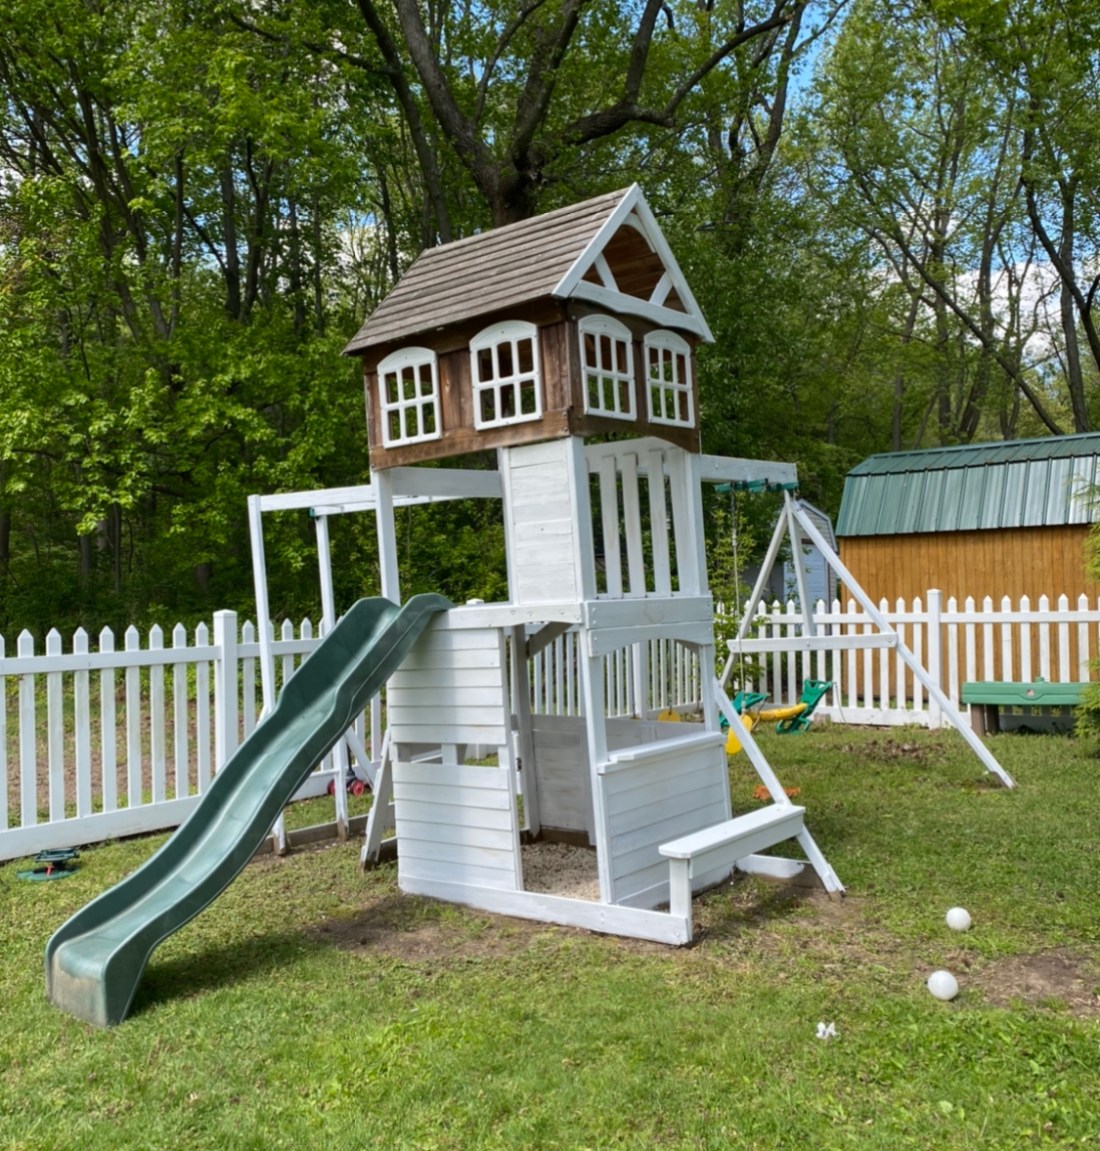
We decided we wanted to move the slide to the side to add more room over top of the seating area and make room for the new awning. We moved the rock wall to the back where the monkey bars are because they weren’t getting much use. We painted the base and some details using white outdoor paint leaving the top the natural wood.
Here is the new layout and we started painting.
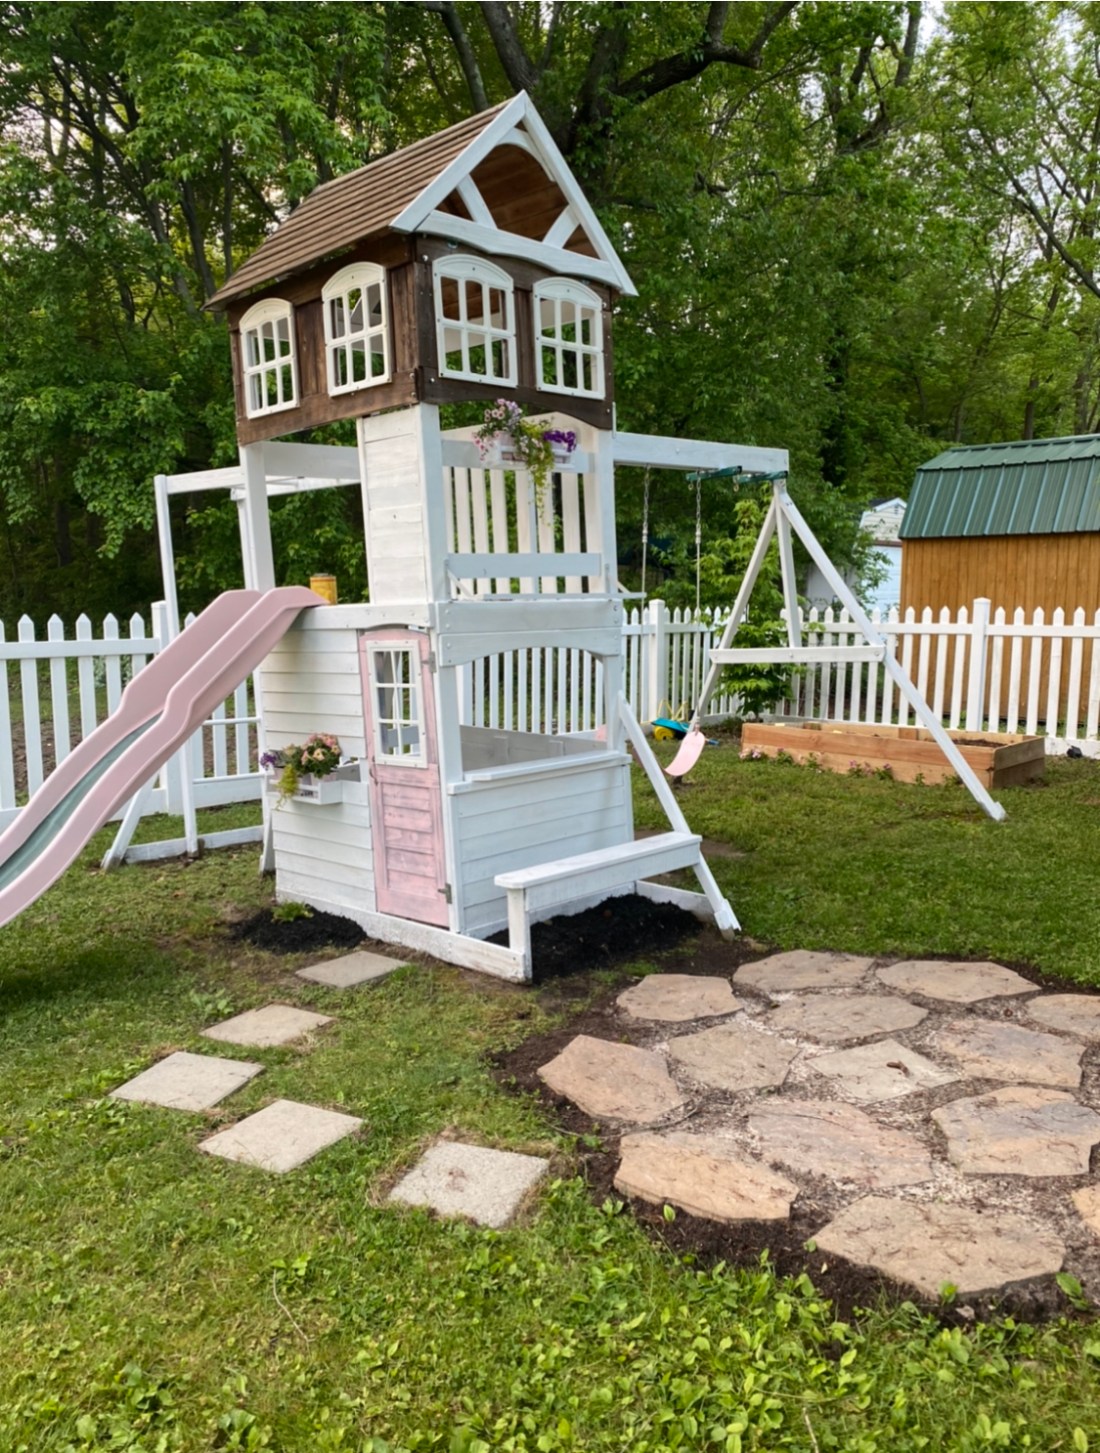
The girls have always wanted a pink slide and pink swings. We used Krylon spray paint for plastics in the Satin Pink Blush. I was nervous how the slide would hold up over the years with all the wear so I decided to tape off the center and only paint the sides and back. I also used the same spray paint for the swing seats. Both the slide and the swings needed a few coats. We also used this paint on their door. I wasn’t 100% happy with how the door turned out. It kind of has a weathered look because paint didn’t give a solid cover. If you want a solid color I would probably buy out door paint or try to use a primer before using the spray paint. This is my first time using this paint for outdoor use so I’m experimenting. So far in the past month it has held up great.


Next up the awning. I saw several different ways to add an awning to a playhouse so I just had to figure out which worked best for ours. I loved the idea of using shelf brackets and turning them upside down. Then adding a thick dowel a crossed the brackets. Its hard to give measurements when it depends on the look you are going for so you just have to play around with placement. Linking the brackets we used here.


Here is the fabric I used for the awning and the pom pom trim. I had planned to use hot glue as its usually my go- to for sewing projects. I just happened to be heading to my Mother-in-laws that night and knew she had a sewing machine so I measured and cut and had it all pinned for her so she could just zip around the edging for me and it turned out perfect! I then bought velcro with a sticky adhesive and added the hard side directly to swing set and the softer fuzzy side to fabric awning. Since the fabric I purchased was not weatherproof and I didn’t spray weatherproofing on it I plan to remove awning when the girls are not playing outside to help prolong the life of the awning. The velcro adhesive makes it so easy and so far has held up great with all the rain we have had.
I had wood IKEA Spice racks laying around from the girls old playroom I used as bookshelves. I decided to paint them white with the outdoor paint and attach to swing set as flower boxes shown below.


I repurposed this old outdoor rubber door mat I was planning on throwing out. Just gave it a good wash, cut it down to size, and painted. I love how it turned out!


We also made a small stone patio and decided it was perfect for their pool in the summer so it doesn’t kill the grass.
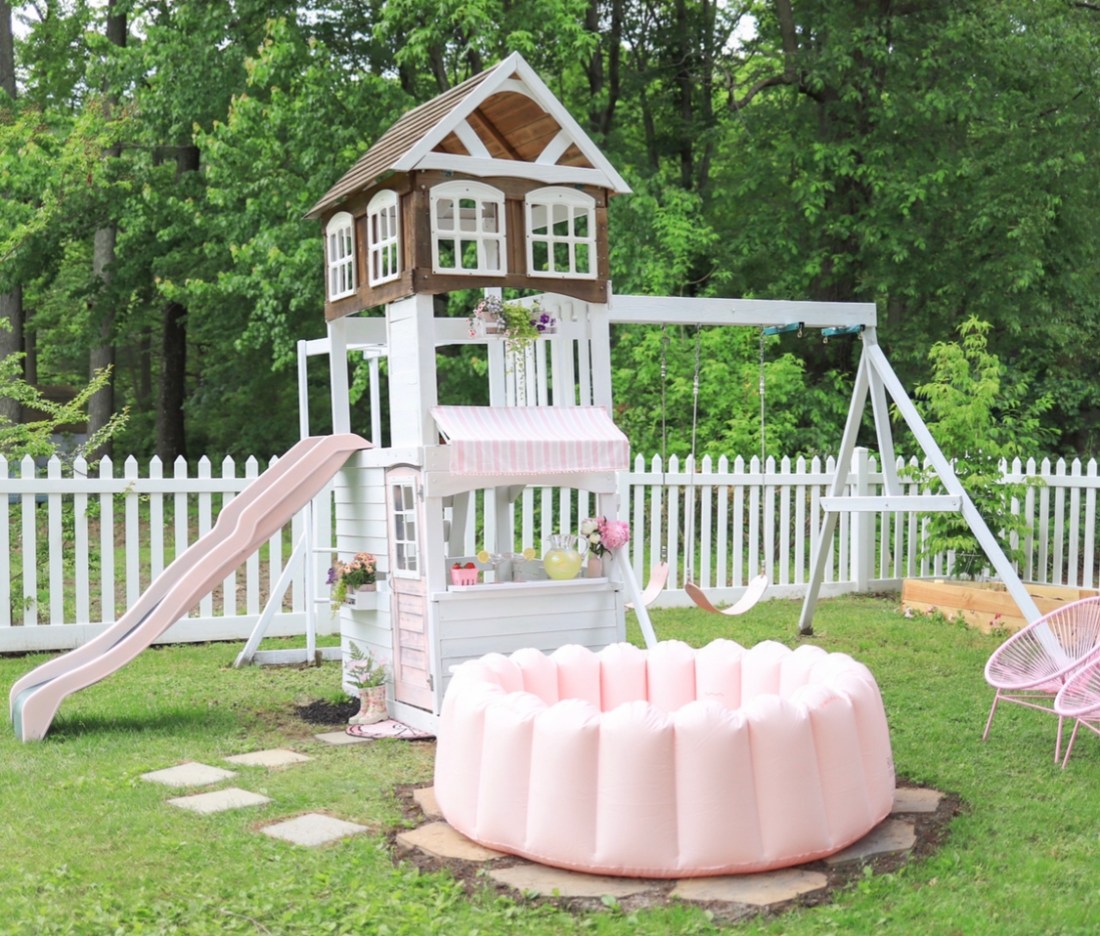
Here are a few photos of what we have finished so far!


The girls are so in love with their NEW swing set and have been playing in it so much more. Hopefully you enjoyed Our Swing Set Makeover and feel free to reach out with more specific questions. We also shared some more of the process on our Instagram page @brynnnora in the Swing Set Makeover Highlight! Check back in a few weeks for some more cosmetic additions that haven’t arrived yet.
This post contains affiliated links. Purchases made with these links are greatly appreciated and helps support my family. There are NO costs add to the purchase price. This is not a sponsored post. All items we purchased by us to try out.
